The first step is to set up the Atlas database - this is the foundation data layer that serve data to the mobile apps, charts, and web apps.
Throughout this guide, you will need to keep track of a lot of information.
Copy and paste the template into a scratch pad, to keep track of it all.
- Login to cloud.mongodb.com - create a free login if needed.
- If needed, create an organization (example: Code For Good).
- Create a project (example: WildAid). Fill in the “Project Name” on the template that you copied to your scratchpad. Case sensitivity matters!
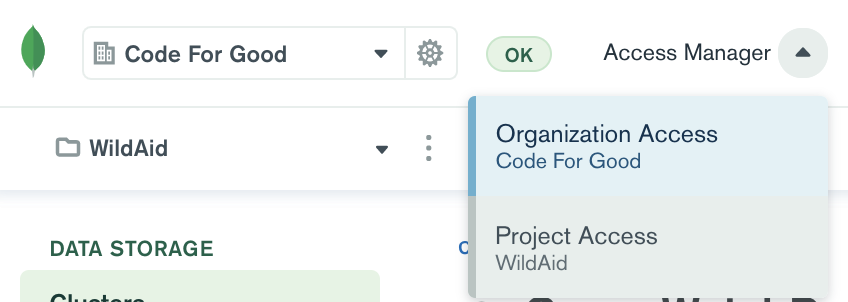
- Click Access Manager, then Organization Access:
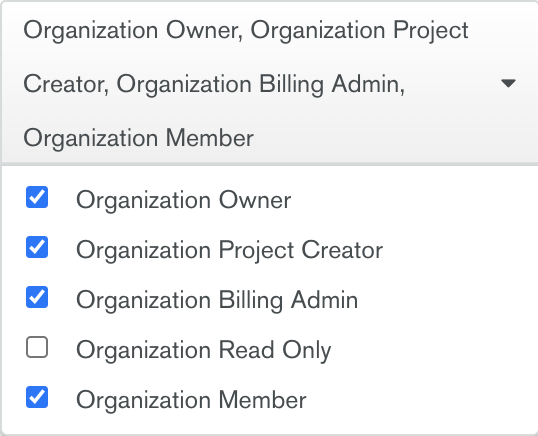
- Click the EDIT PERMISSIONS button next to your name.
- Give yourself the following permissions:
Organization Owner, Organization Project Creator, Organization Billing Admin, Organization Member
and click the green checkmark.
- Create a 4.4 Cluster:
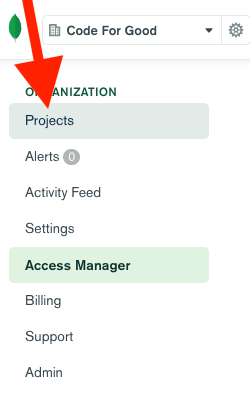
- Click “Projects” on the left-hand navigation menu
- Click your project name (example: WildAid)
- Click Build a Cluster
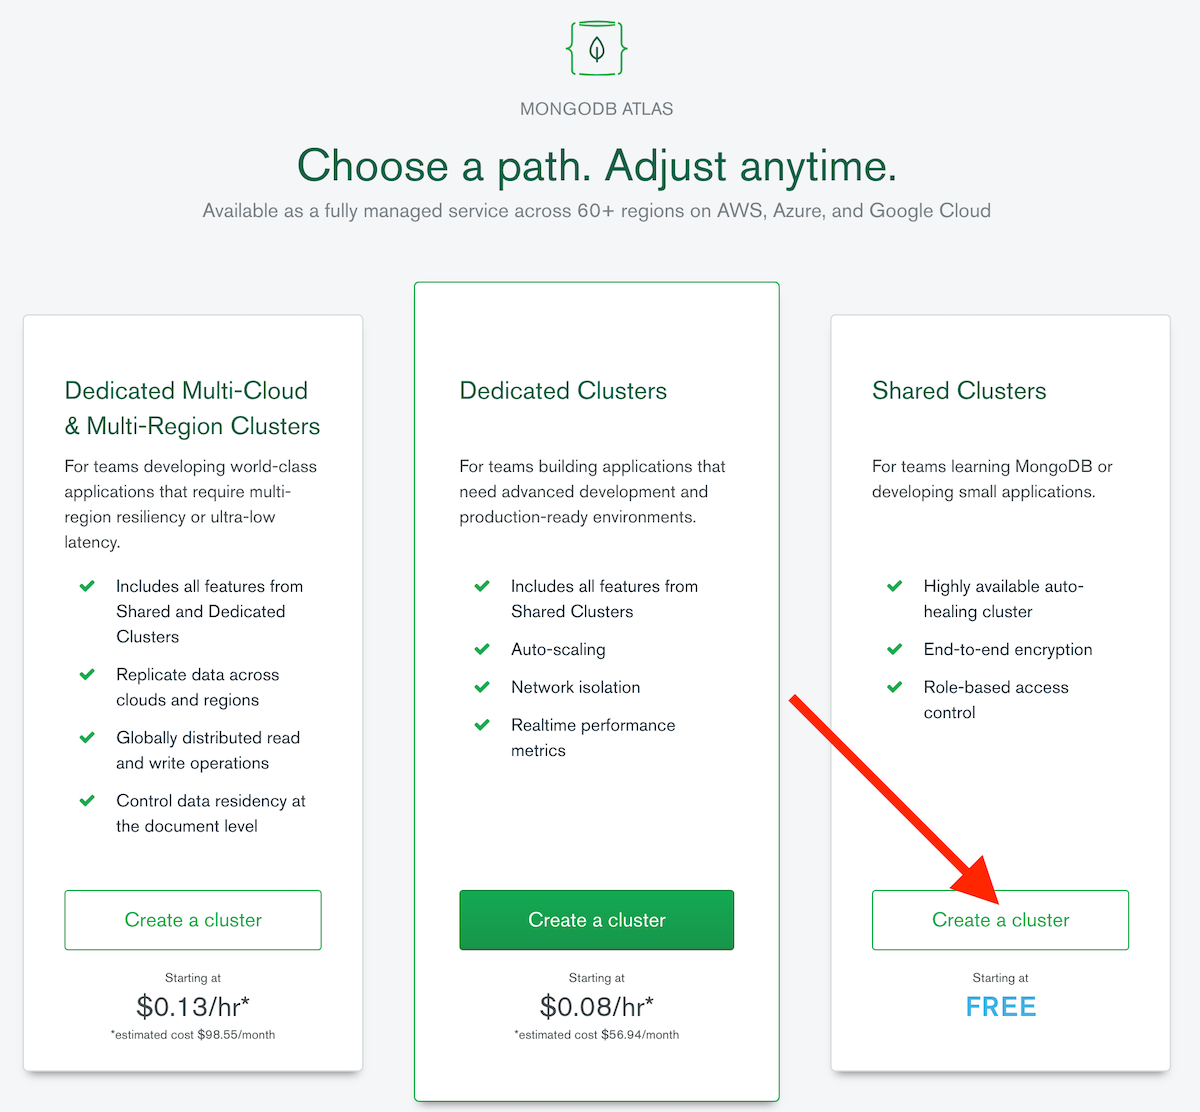
- Choose a path - choose the FREE Shared Clusters on the right:
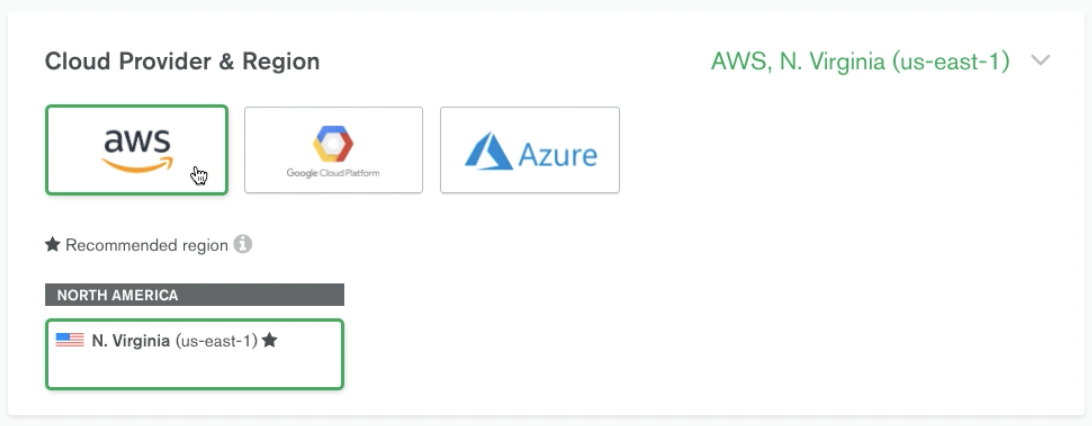
- Choose Cloud Provider and Region
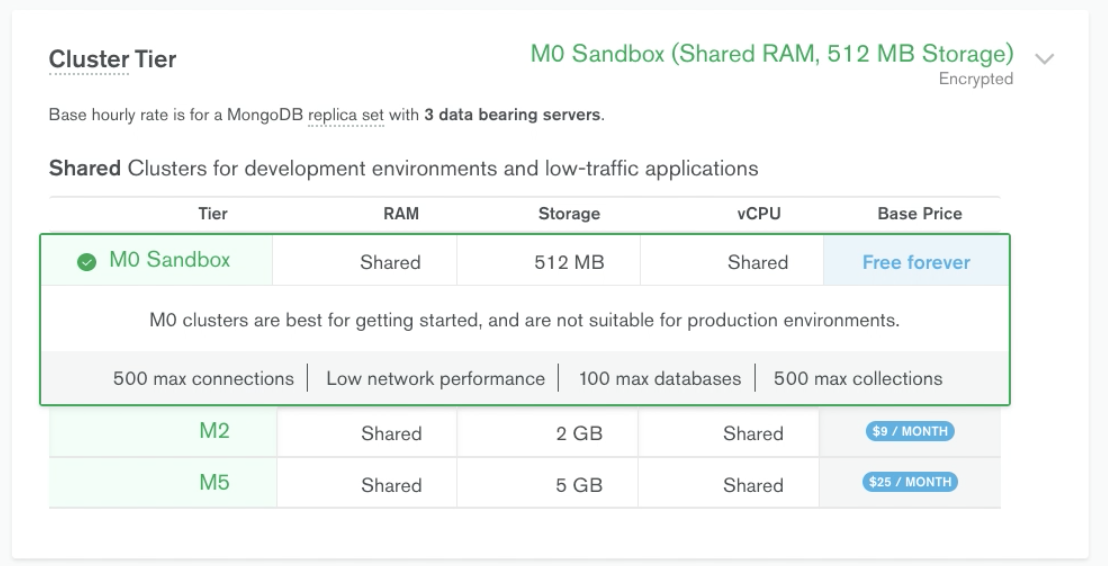
- Choose Cluster Tier - choose M0, the free tier
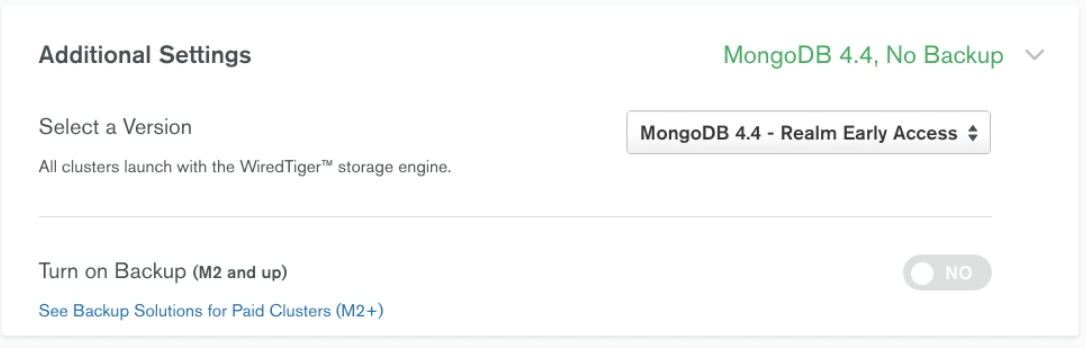
- Select a Version - MongoDB 4.4
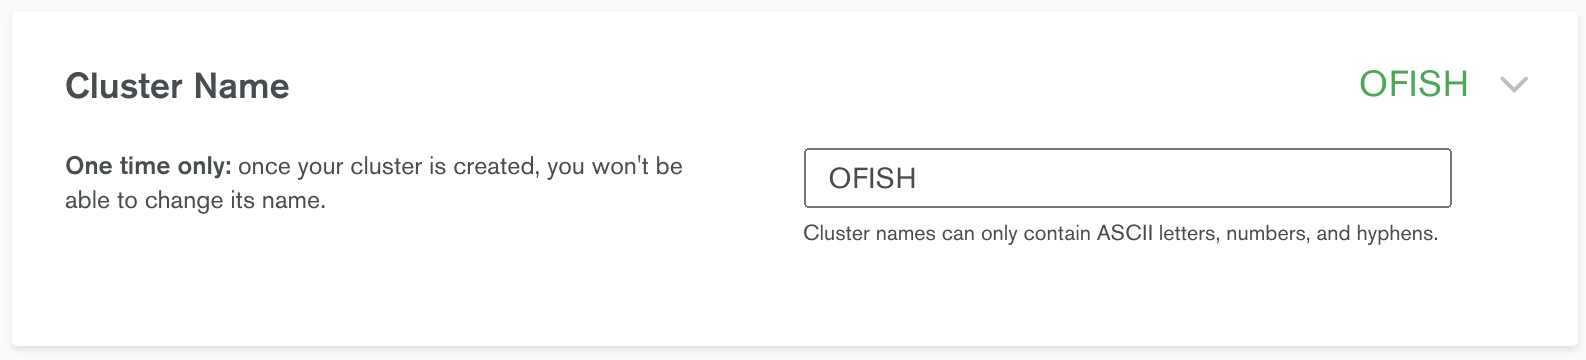
- Cluster Name (example: OFISH) - write this in template under “Atlas Cluster Name”
- Click “Create Cluster” - this will take a few minutes
- Click “Projects” on the left-hand navigation menu
Congratulations, you have set up an Atlas database!